

Flutter Video Call App With Firebase and ZegoCloud
Integrating ZegoCloud SDK on Flutter


Integrating video chat , calls ,video conferencing into your flutter apps can be tricky and difficult , you will have to work with web sockets and webRTC but what if l tell you it's very easy with ZegoCloud sdk which is a company that provides global communication SDKs .In this article l am going to show you how easy it is to integrate zegocloud into flutter apps.
Before we begin check thisarticleon ZegoCloud website on how to configure and add permissions on android and apple iOS
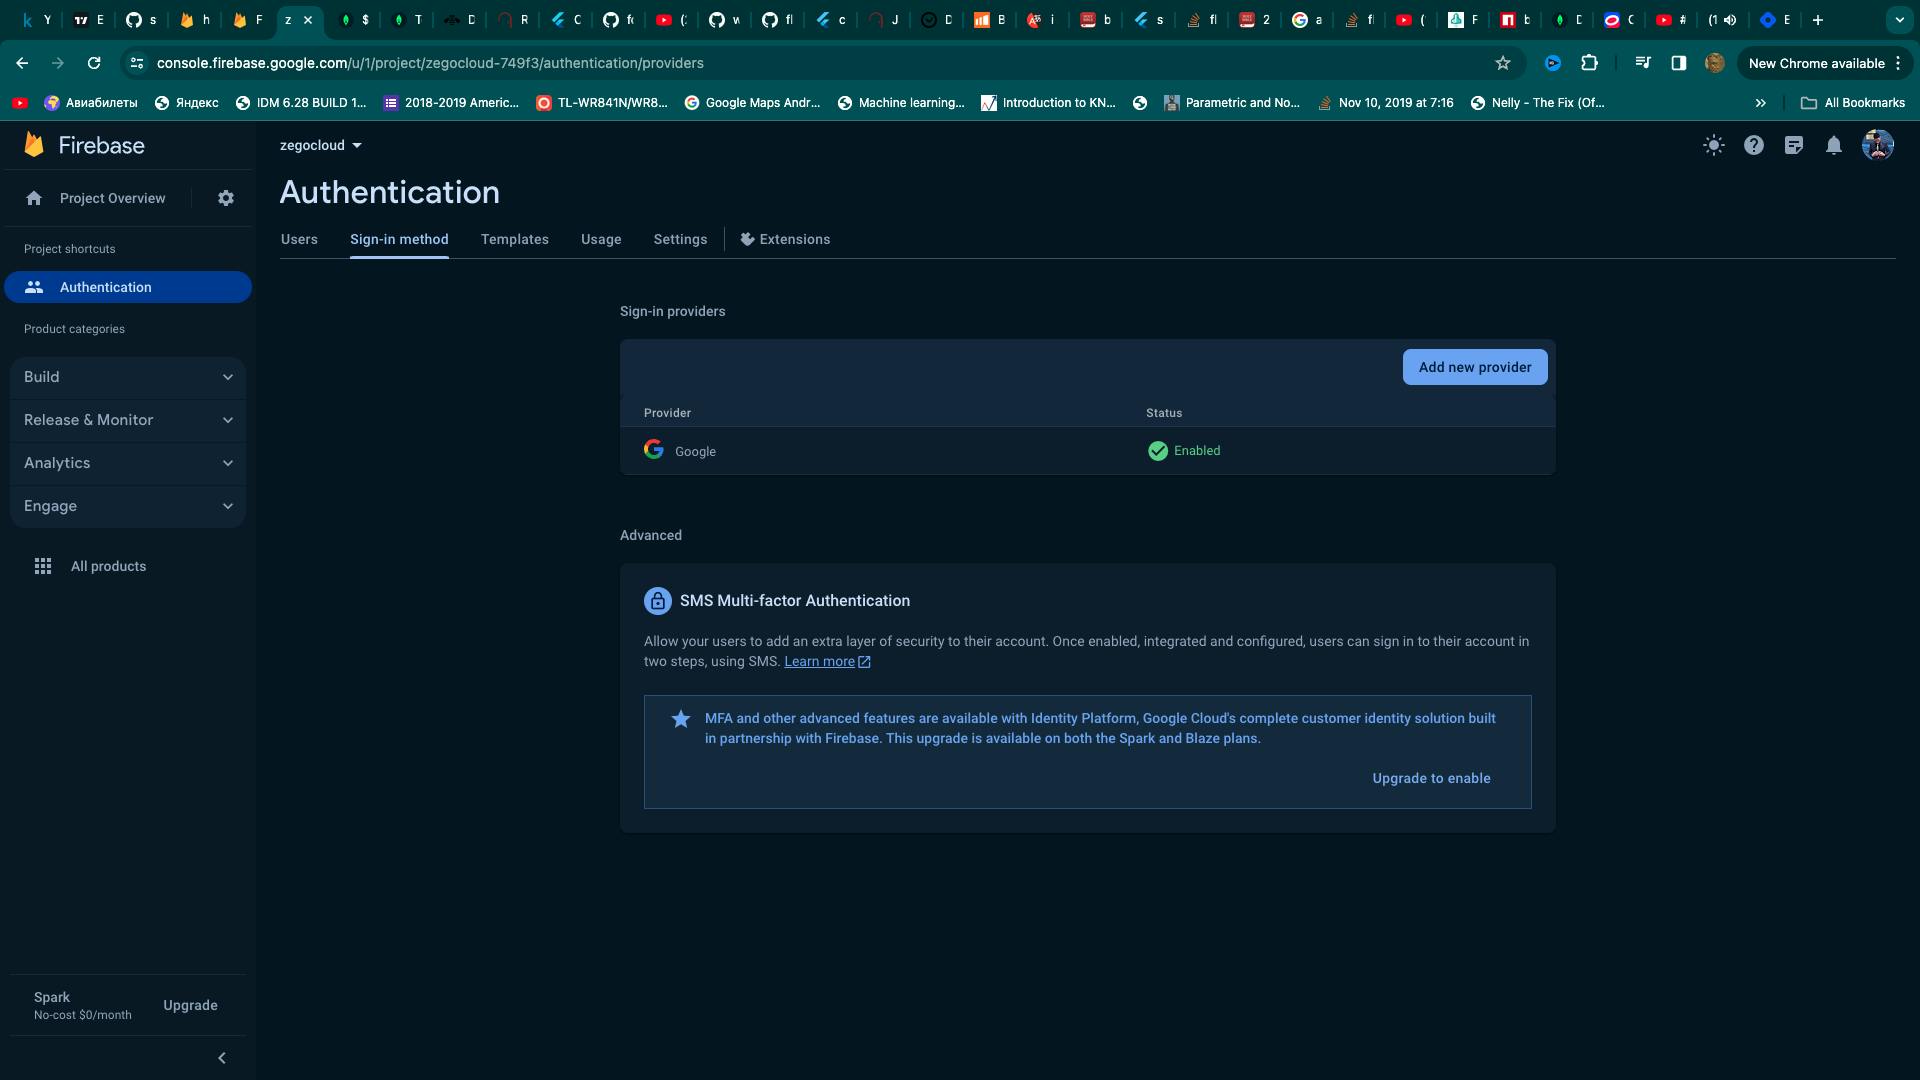
We are going to use firebase and google auth for authenticating users and obtaining unique user ids. So the first thing is to go to firebase console website and create a new project .After that go to the authentication and sign in method and make sure that google is enabled as shown by the screenshot below .
After enabling google sign in we need to connect to our firebase project using firebase cli first login by using the firebase login command in your terminal

After that we need to install firebase cli by using this command dart pub global activate flutterfire_cli in the terminal. This command will install flutter cli to your computer.
After this install firebase core by using this command flutter pub add firebase_core, otherwise you will get error when you try to use firebase .
The last step is then configure firebase to communicate with our project using the flutter configure command flutterfire configure
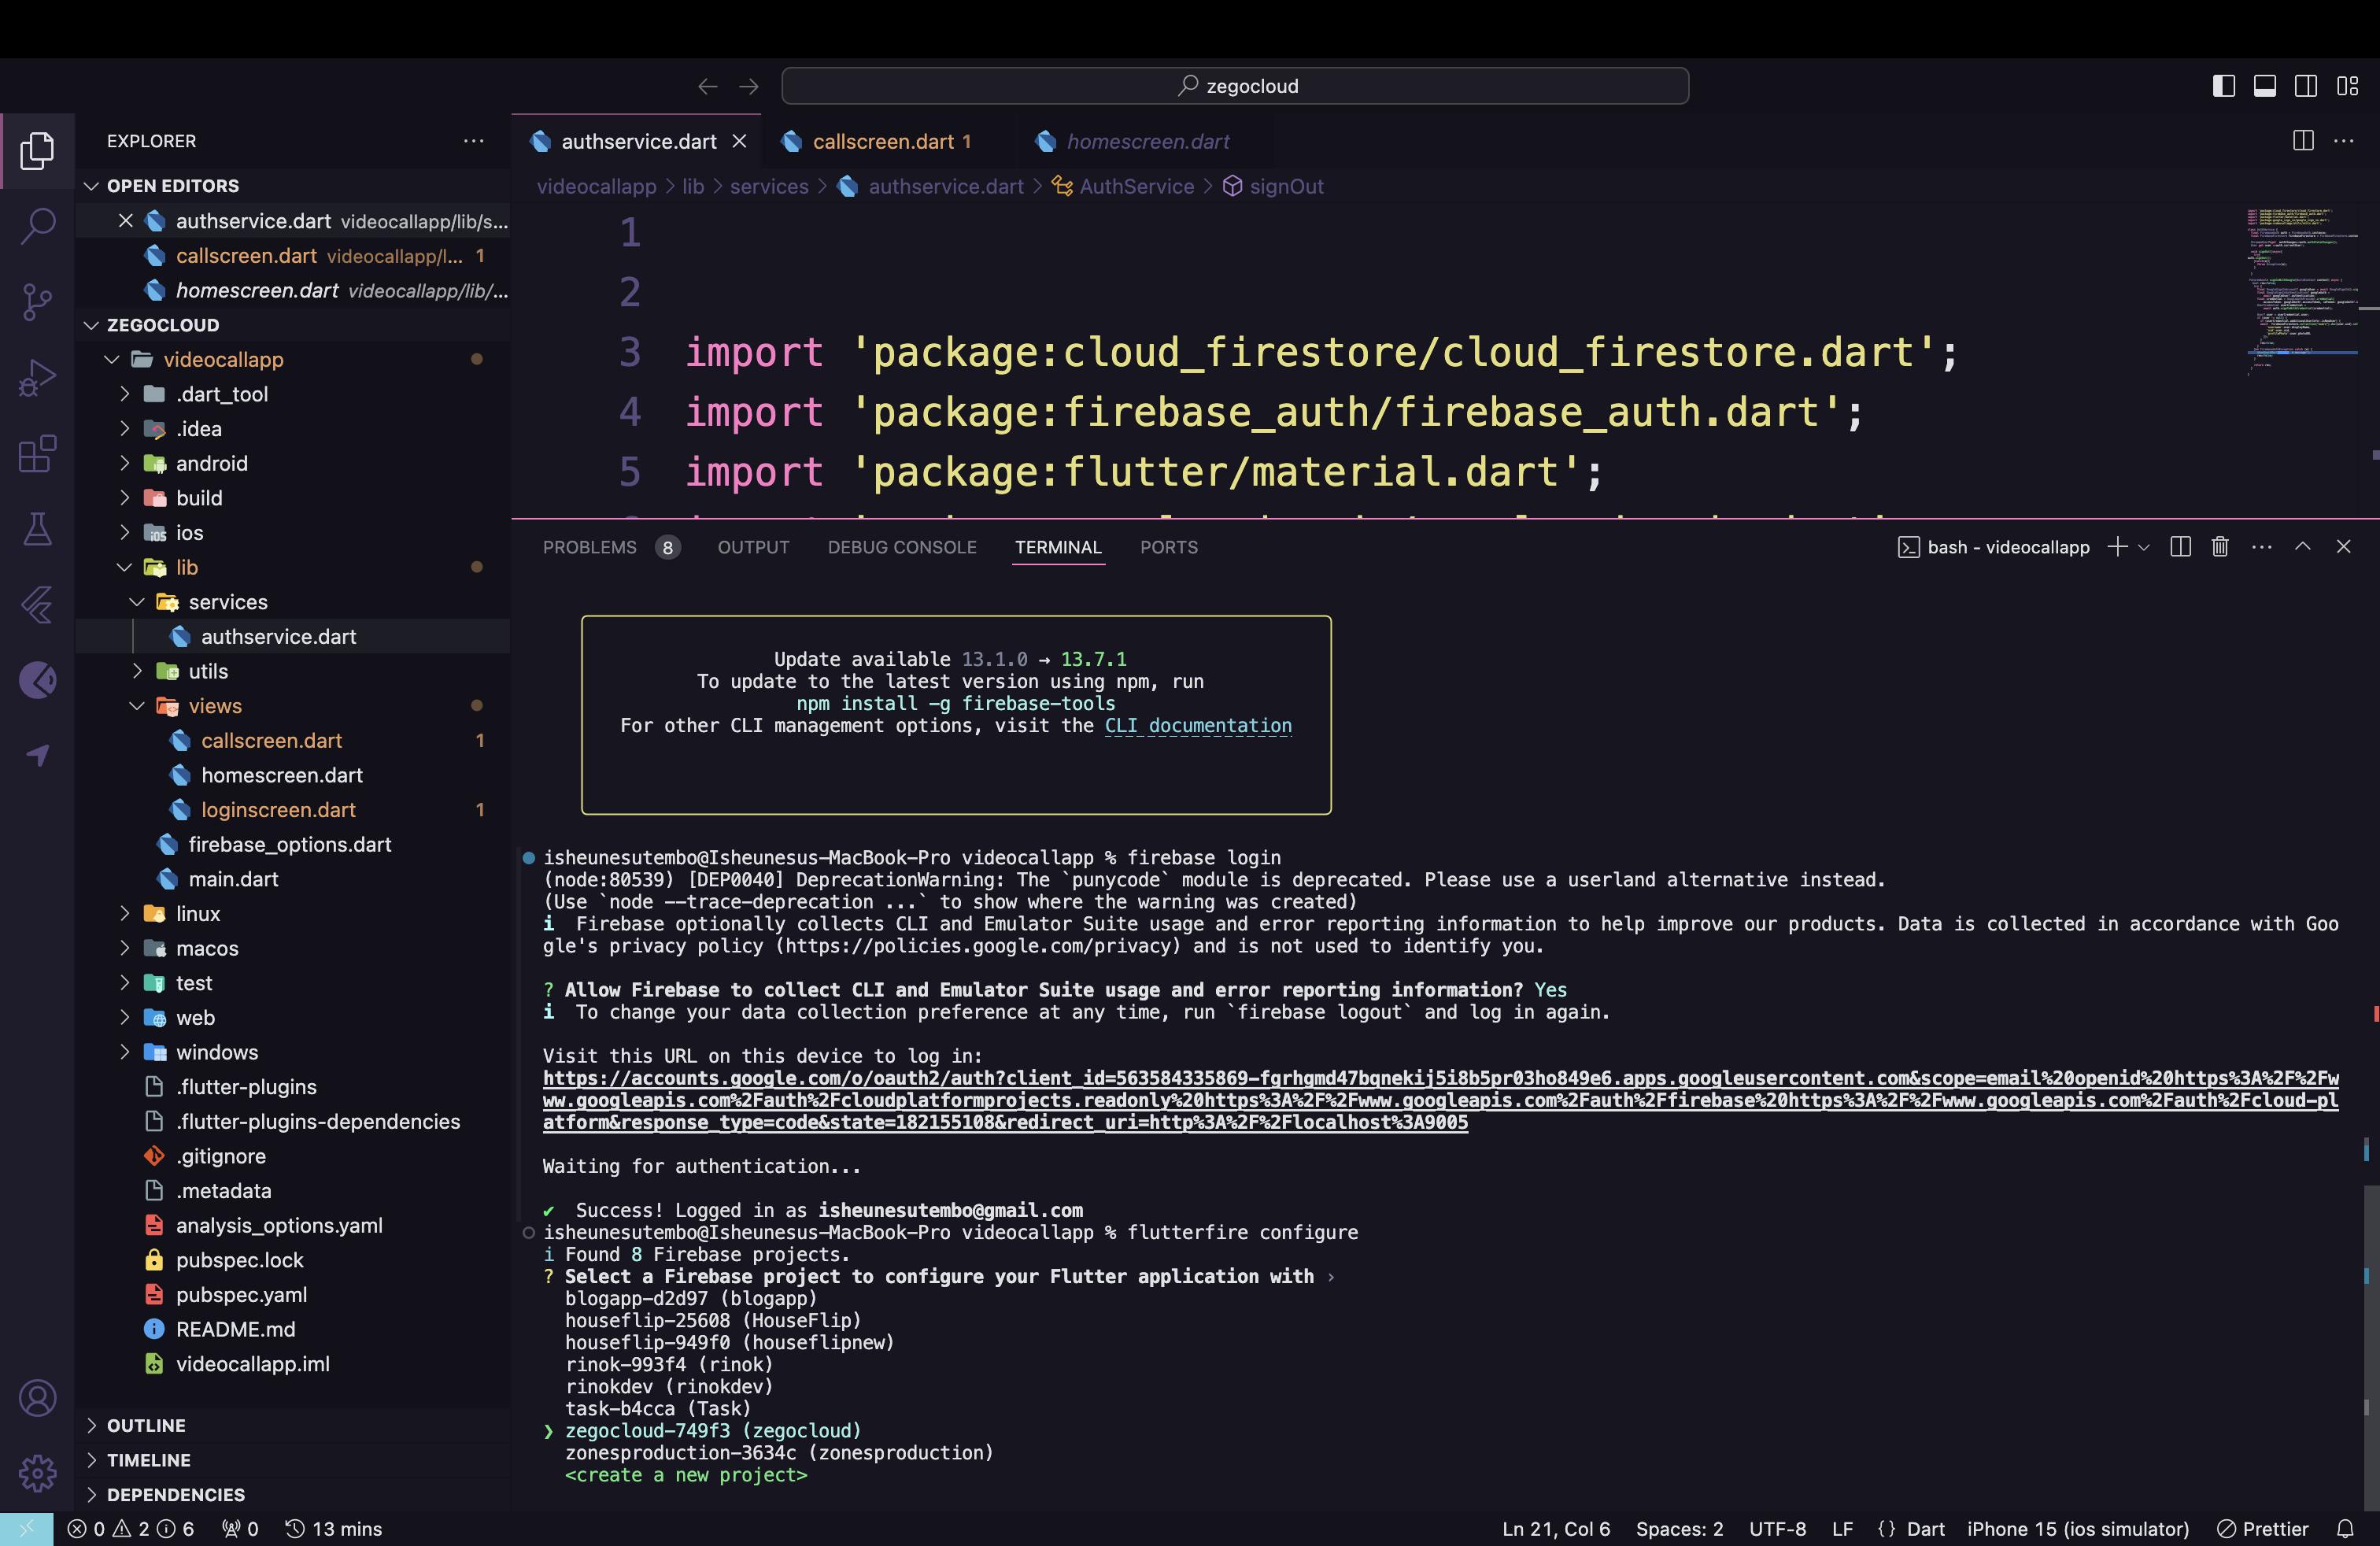
you will see a list of projects on your firebase console , select the one you created in this in this case l selected the Zegocloud project .Perfect now we are done setting up firebase let's now dive into the code.
Inside the main.dart we need to initialize firebase as follows
void main() async{ WidgetsFlutterBinding.ensureInitialized(); await Firebase.initializeApp(options: DefaultFirebaseOptions.currentPlatform); runApp(const MyApp()); }
Inside our lib folder we need to create 2 folders the views folder for our user interface and services folder for our firebase auth that will communicate with firebase for authenticating users as follows
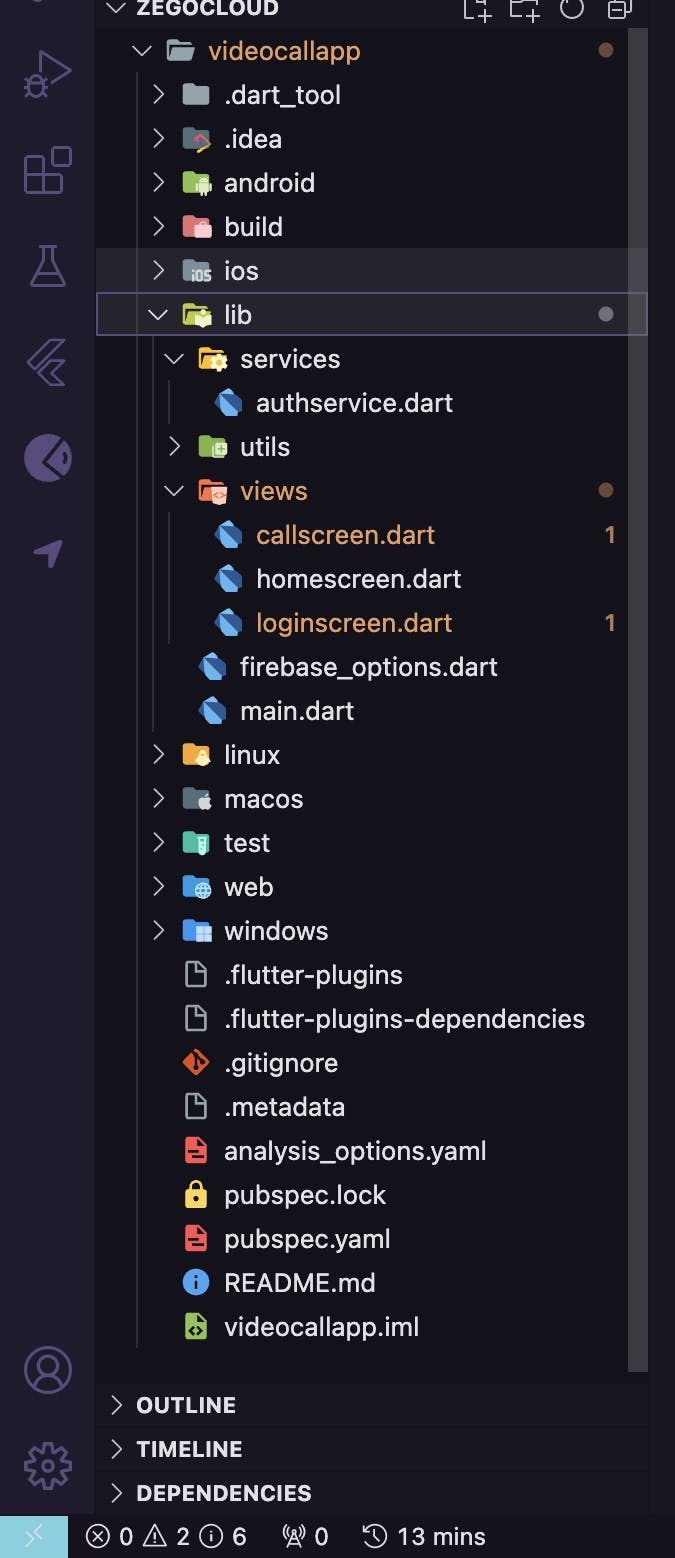
After this create an authservice.dart file inside the service folder
Inside the authservice file we need to first initialize firebaseauth and firebase firestore as follows:
  final FirebaseAuth auth = FirebaseAuth.instance;
  final FirebaseFirestore firebaseFirestore = FirebaseFirestore.instance;
The next step is getting auth state changes and current user :
 Stream<User?>get  authChanges=>auth.authStateChanges();
  User get user =>auth.currentUser!;
The first line is used to monitor changes in the authentication state for example if the user is currently logged or if they are logged out , we can use this to show users views according to their authentication state for example if they are logged in they should see a home screen , if they are logged out they should see the login page.
The next is the sign out method for logging out users
void signOut()async{
    try{
   auth.signOut();
    }catch(e){
      throw Exception(e);
    }

  }
The next method is the sign in user with google:
Future<bool> signInWithGoogle(BuildContext context) async {
   bool res=false;
    try {
      final GoogleSignInAccount? googleUser = await GoogleSignIn().signIn();
      final GoogleSignInAuthentication? googleAuth =
          await googleUser?.authentication;
      final credential = GoogleAuthProvider.credential(
          accessToken: googleAuth?.accessToken, idToken: googleAuth?.idToken);
      UserCredential userCredential =
          await auth.signInWithCredential(credential);

      User? user = userCredential.user;
      if (user != null) {
        if (userCredential.additionalUserInfo!.isNewUser) {
        await  firebaseFirestore.collection("users").doc(user.uid).set({
            'username':user.displayName,
            'uid':user.uid,
            'profilePhoto':user.photoURL
          });
        }
        res=true;
      }
    }on FirebaseAuthException catch (e) {
      showSnackBar(context, e.message!);
      res=false;
    }

    return res;
  }
In this method we get user credentials from google such as access token and tokenId , we then use those credentials to sign in with firebase auth.
This is the code for the whole authservice:
import 'package:cloud_firestore/cloud_firestore.dart';
import 'package:firebase_auth/firebase_auth.dart';
import 'package:flutter/material.dart';
import 'package:google_sign_in/google_sign_in.dart';
import 'package:videocallapp/utils/utils.dart';

class AuthService {
  final FirebaseAuth auth = FirebaseAuth.instance;
  final FirebaseFirestore firebaseFirestore = FirebaseFirestore.instance;

  Stream<User?>get  authChanges=>auth.authStateChanges();
  User get user =>auth.currentUser!;

  void signOut()async{
    try{
   auth.signOut();
    }catch(e){
      throw Exception(e);
    }

  }

 Future<bool> signInWithGoogle(BuildContext context) async {
   bool res=false;
    try {
      final GoogleSignInAccount? googleUser = await GoogleSignIn().signIn();
      final GoogleSignInAuthentication? googleAuth =
          await googleUser?.authentication;
      final credential = GoogleAuthProvider.credential(
          accessToken: googleAuth?.accessToken, idToken: googleAuth?.idToken);
      UserCredential userCredential =
          await auth.signInWithCredential(credential);

      User? user = userCredential.user;
      if (user != null) {
        if (userCredential.additionalUserInfo!.isNewUser) {
        await  firebaseFirestore.collection("users").doc(user.uid).set({
            'username':user.displayName,
            'uid':user.uid,
            'profilePhoto':user.photoURL
          });
        }
        res=true;
      }
    }on FirebaseAuthException catch (e) {
      showSnackBar(context, e.message!);
      res=false;
    }

    return res;
  }

}
Inside the views folder create a folder called loginscreen.dart and paste the following code :
import 'package:flutter/material.dart';
import 'package:sign_in_button/sign_in_button.dart';
import 'package:
/services/authservice.dart';
import 'package:videocallapp/views/homescreen.dart';

class LogInScreen extends StatelessWidget {
  AuthService _authService=AuthService();
   LogInScreen({super.key});

  @override
  Widget build(BuildContext context) {
    return Scaffold(
      body: Center(
        child: SizedBox(height: 50,
        width: 350,
        child: SignInButton(Buttons.google,
        onPressed: ()async{
         bool res=await _authService.signInWithGoogle(context);
        if(res){
          Navigator.push(context, MaterialPageRoute(builder: (context)=>HomeScreen()));
        }
        },),),
      ),
    );
  }
}
Make sure you add the sign_in_button library to the pubspec.yaml file
Inside main.dart file under MaterialApp add the following code:
@override
  Widget build(BuildContext context) {
    return MaterialApp(
      title: 'Flutter Demo',
      theme: ThemeData(

        colorScheme: ColorScheme.fromSeed(seedColor: Colors.deepPurple),
        useMaterial3: true,
      ),
      home: StreamBuilder(stream: AuthService().authChanges,
      builder: (context,snapshot){
        if(snapshot.connectionState==ConnectionState.waiting){
        const  Center(child: CircularProgressIndicator());
        }
        if(snapshot.hasData){
          const HomeScreen();
        }
        return LogInScreen();
      },)
    );
  }
This code checks our authstate in the authservice that we talked about and if it has data that means the user is logged in we will display the homescreen otherwise the login screen.Now we are done with firebase let's move to the interesting part which is zegocloud
- Go to zegocloud dashboard by using this link https://console.zegocloud.com/dashboard
2)Create a new project on the dashboard by clicking the create project

After creating an app you will get an appId and appSign which we will use soon
The next thing we need to do is to create a homescreen
import 'package:flutter/material.dart';
import 'package:videocallapp/views/callscreen.dart';

class HomeScreen extends StatefulWidget {
  const HomeScreen({super.key});

  @override
  State<HomeScreen> createState() => _HomeScreenState();
}

class _HomeScreenState extends State<HomeScreen> {
  final callId=TextEditingController(text: "testCallId");
  @override
  Widget build(BuildContext context) {
    return Scaffold(
      body: Row(children: [
        Expanded(child: TextFormField(
          controller: callId,
          decoration: const InputDecoration(labelText: "start call by id"),
        )),
        ElevatedButton(onPressed: (){
          Navigator.push(context, MaterialPageRoute(builder: (context)=>CallScreen(callId: callId.text)));

        }, child: Text("Call"))
      ]),
    );
  }
}
In the HomeScreen widget we have a callId which we are going to pass in to the call screen .The logic behind this is because users in the same call will have the same callId.The Elevated button will take us to the callscreen widget below
import 'package:flutter/material.dart';
import 'package:videocallapp/services/authservice.dart';
import 'package:zego_uikit_prebuilt_call/zego_uikit_prebuilt_call.dart';

class CallScreen extends StatelessWidget {
  String callId;
  AuthService _authService=AuthService();
   CallScreen({super.key,required this.callId});

  @override
  Widget build(BuildContext context) {
    return  ZegoUIKitPrebuiltCall(
      appID: ,
      appSign:"", // Fill in the appSign that you get from ZEGOCLOUD Admin Console.
      userID: _authService.user.uid,
      userName: _authService.user.displayName!,
      callID:callId ,
      // You can also use groupVideo/groupVoice/oneOnOneVoice to make more types of calls.
      config: ZegoUIKitPrebuiltCallConfig.oneOnOneVideoCall(),
    );
  }
}
In the CallScreen widget web return the ZegoUIKitPrebuiltCall which takes in the appId you got from the dashboard and the appSign we then pass in the userId from firebase and the username from firebase also we also have the config parameter were we tell ZegoCloud which SDK to use in this case we are using oneOnOneVideoCall() , you can use voice call , video conferencing e.t.c.
· Get ZEGOCLOUD UIKits for 10,000 free mins: https://bit.ly/3w7RrvV
· Take Advantage of ZEGOCLOUD: https://bit.ly/4bqi4wc
· Learn about 100% customized video call SDK: https://bit.ly/3HPoKX9
· How to build Flutter video call App: https://bit.ly/3HMbq5Z
ZEGOCLOUD video call SDK &API allows you to easily build your live video chat apps within minutes.
You can get the source code for this article on github
You can also watch a video tutorial here